
On behalf of Rona, Sharon, Elaine, Karen, Jenny, and myself, we welcome you to our tutorial. So, what goodies do we have to share today? Well, our challenge is to MAKE A PROJECT THAT REFLECTS THE COLORS OF YOUR COUNTRY, or even maybe where you would like to live someday, or your favorite country to visit if you are a globetrotter! Rona put together a fabulous project and tutorial to share with you today, and this one is a doozie!!!

Tutorial for a Loopy Flower by Rona Mallard
Items needed: Twine or String; 12 straight pins; cork or cardboard; scissors; needle
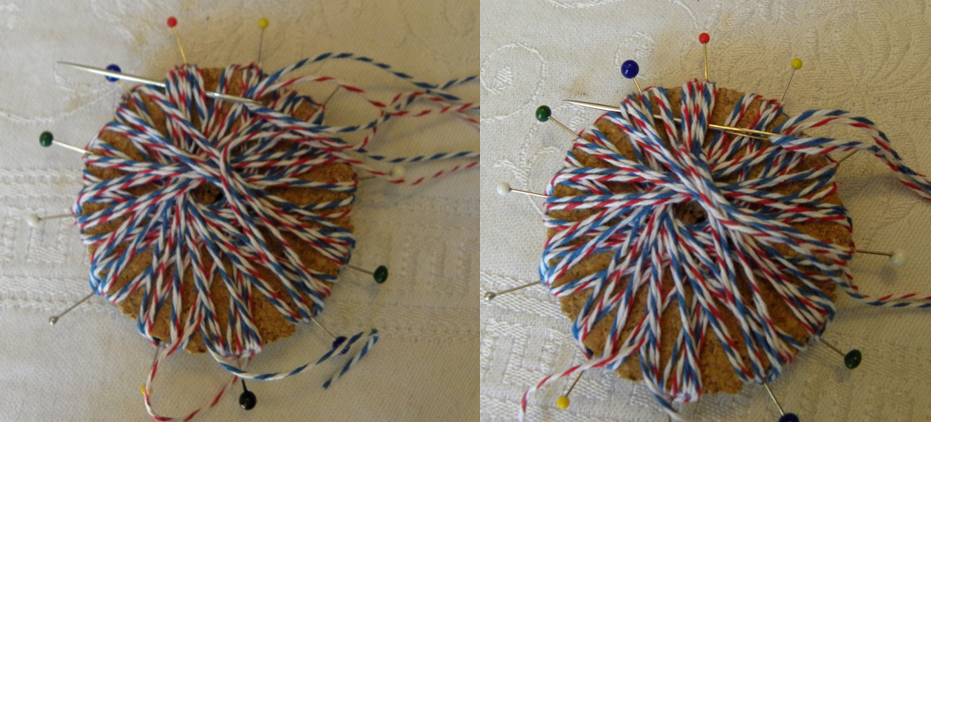
First you will need to make your loom. I used a thick cork board cut to a 2 1/4 circle. You can also use cardboard (or two pieces of chipboard glued together) as long as you can stick the pins in the edges. You will stick your 12 pins in at equal distances around the circle. I placed a red pin (which is my starting place across from black) then matching colors opposite each other all the way around. It does not have to be perfect as long as you get all 12 pins in.


Next, Take your twine and leaving a 2 inch tail; wrap around the pins from top to bottom (this is why I placed the colored pins opposite each other it helps remember where you are) My first wrap is always around the red with the tail hanging by the black. Go around the loom twice (if you are using a single string of twinery twine you may want to go around 3 times).

Once you are finished wrapping, cut your twine with 12 – 14 inches out and thread through your needle.
You will then “backstitch” around the circle. I always start at the red pin going under all of the twine wrapped around that pin. From then on you will go under two of the sets of twine (two pins). This will make a loop over each of the “petals”. I like to squish those stitches down to the center of the circle as close as you can for a nice loopy petaled flower. I go around the circle twice because it ends up with a nice braided look when you flip it over.

After you have gone around twice you should be back at the red pin and have a tail left to tie to the tail you had in the beginning (by the black pin). Tie a knot to secure. Then you will begin pulling out your pins to release each petal. I pull it out then replace it right back in the same place so it will be ready for your next flower. Go all the way around to release the entire flower and then flip it over. Your loopy flower is finished!!

I hope you have lots of fun with these. I certainly have!!! I have made several for wreaths and cards. I have even seen these on banners

Woo hoo! Look at THAT beautiful creation! Rona certainly outdid herself on this tutorial and that gorgeous wreath! Rona says she was inspired by a Pinterest project from Meridian Road. Thanks so much for stopping by and joining us on the 2000 Member Party and Blog Hop! If you started at the beginning and made it all the way to me, I should be the last one on your blog trip. If you finished up here, you can jump back over to The Outlawz and click on the 2000 Member Party tab at the top of the main page. If you still haven't visited everybody yet, here is the list and the links:
Blog Hop Order
The Outlawz Host: Colleen Holmes
CAS Host: Pryn Garritan
Greetings Host: Tina Gilliland
Color Host: Teresa Arsenault
Sketch Host: Cindy Potentier
Twisted Thursdays Host: Patricia St. Martin
Copic/Promarkers Host: Darlene Lyons
Paper Ala Mode: Theresa Lee (you are here)
Don't forget to do a few things:
1. Leave a comment here on this blog.
2. Head back over to The Outlawz and click on the 2000 Member Party tab at the top of the Main Page. Click on the Tutorial Blog Hop thread and follow the instructions there And if you make a project, please post it in the Inlinkz.
3. Join in playing some of our games and challenges throughout the week.
4. Have fun!
Big hugs to you all, and thanks again for hopping along!


