Saturday, December 21, 2013

A BLUE ALLIGATOR FOR CHRISTMAS

Hi, and thanks so much for stopping by!  This week's challenge over at The Outlawz is to make a project with a non-traditional theme.  Our sponsor this week for the Saturday Paper a la Mode Challenge is Bugaboo Stamps.  Bugaboo has the cutest digis, and this cutie pie alligator, swinging on a candy cane, was last week's freebie.  Isn't he sweet?

Well, he's BLUE because he misses somebody, so he's a bit non-traditional in his blue-ness.  Yes, I used some traditional colors too (lots of red, because I just am mentally incapable of going fully non-traditional), and I added some traditional snowflakes, but what is life without snowflakes, plus I had lots of extras from a recent project and I happen to like them, so there you go!


If you get a chance, stop by the Bugaboo Stamps site and get yourself some digis.  They have a new freebie every week, so even if you don't have the funds to buy something right now, you can still enjoy their great artwork!

Thank you for stopping by to visit!  I wish you a Merry Christmas filled with love and blessings!  Big hugs!

Saturday, December 14, 2013

S IS FOR SANTA

Hi!  Thanks so much for stopping by to visit!  Busy, busy, busy - that's what everybody seems to be these days.  But this cute Santa digi (Santa Naptime) from Rick St. Dennis has done all his work and he's ready for some "Peace On Earth"!  I colored him with Prismacolor pencils, and kept the colors just the standard Christmas colors or simply white - didn't want all the conflicting detailed colors.  Everything blends nicely with the background patterned paper and cardstock colors.  I added Diamond Stickles to is fur trim, but it just doesn't photograph well.  I added a few touches of bling with some gems - I do love my bling!

Rick St. Dennis is our sponsor this week over at The Outlawz Saturday Paper a la Mode Challenge, so please check out his wonderful digital stamp designs at his Zibbet site.  I love his work - so much beautiful detail with a touch of humor.  I admit to not being a fan of his "creepy" lines, but he's got a wonderful selection that has plenty to offer even the most discriminating artist!


Thank you so much for stopping by to visit!  Hopefully if you've been busy, busy, busy this Holiday season, you can find time to get some Zzzzzz's like Santa this weekend!

Big hugs and showers of blessings to you!

Saturday, December 7, 2013

GETTING READY, AND A LAST MINUTE CHRISTMAS CARD

Hi, glad you stopped by!  I know everybody is so busy this month - just seems like there are never enough hours in the day to get everything done.  I'm actually just about done with my holiday shopping - just a few stocking stuffer type things to gather up and I'll be pretty much done.  But then I've got to get some packages mailed, Christmas cards in the mail, ...

I love making Christmas cards!  And I like to make each one different - I can't stand the repetition of makiing a bunch of the same thing - takes all the fun out of it for me.  Of course it's a lot faster and takes a lot less thought, but I just can't do it.

This week we are having a "Last Minute Christmas Card" Challenge over at The Outlawz for our Saturday Paper a la Mode Challenge.  I had some Tim Holtz stamps that I had never used and some leftover diecut snowflakes from a couple of weeks ago, so tried to get a bit creative.  I outlined the Santa in the large stamped image with some green Copics to add a bit of color, and I put just a teeny bit of color in his face and hands.  I also added some color to the ticket stamp.  It didn't take me long to pull this together, so I guess it fits the bill for "Last Minute".


Thanks again for stopping by, and I hope that your Holiday preparation are going smoothly, and that you take the time to enjoy the sights, sounds, and scents of the Season!  Hugs and blessings to you!

Saturday, November 30, 2013

THANKSGIVING AND A COPYCAT CHALLENGE

Happy Thanksgiving!  I hope wherever you were and whoever you were spending time with, you had a day full of joy and blessings!  I know I did!  Here are some pictures of my two kids around the dining table full of food - can you believe I cooked all of that just for the three of us?  We'll be eating a lot of leftovers for the rest of the long weekend, that's for sure!


This week over at The Outlawz Saturday Paper a la Mode, we are having a "Copycat" challenge.  We all had the same digi image from the lovely Anne Fenton, and we all used that same image for our projects.  Isn't that fun???  Here's mine.  I have to admit that I still need a lot of practice on my Copic coloring skills, but it was such a cute design that Anne did for us, I still love it, even if I don't love my coloring quite so much!


I am so thankful to God for every blessings He has given me!  Jesus, my two wonderful children, my home, nature, my family and friends, and on and on and on.  I may not have much money, but I am rich in the joys of life!  I hope you are too!

Thanks again for stopping by!   Big hugs to you and showers of blessings!

Monday, November 25, 2013

DIE CUTS

Hello, and thanks for stopping by!

This week our Saturday challenge over at The Outlawz Saturday Paper a la Mode is to use diecuts and punches for our projects.

I made this card using a die set from Spellbinders.  I had some glitter cardstock in my stash, and used that for some of the snowflakes - I do love my bling!  The background snowflakes are stamped using a Tim Holtz stamp that I have had for years.  It's one of my alltime favorites!


Nothing like some pretty snowflakes to bring in the Season!

Thanks again for stopping by, and hugs and blessings to you!  Have a wonderful Thanksgiving with your loved ones!

Saturday, November 16, 2013

STARS UPON THARS!

Hi!  Thank you for stopping by to visit!

I just love this time of year - I can get out all my Christmas/Winter crafting stuff and just go to town!  This week I needed to make a project that uses a star and/or a snowflake.  I wanted to do something other than a card, so I put my thinking cap on and came up with a little door hanger project - L is for my last name.  Conveniently, L is also the unit my son is in at Virginia Tech Corps of Cadets, so I will let him take this back to school after Thanksgiving break to use as a decoration in the dorm if he wants to.  It's a bit "girly" for him, but I guess he can always tell everyone that his mom made it!

I used a chipboard letter, covered it in some paper, and added a few rubons and some snowflakes.  I also used some pretty gold ribbon for the hanger.

I used a chipboard star, covered it in tiny glass beads, then made some beaded drops to hang from several of the points.  Can't have too much bling!


The first picture is of it hanging on my front door. This next photo is more of a closeup of the star and the beaded drops.


 This final photo zooms in on a portion of the star, so you can see the detail of the glass beads. I love those things, although they're a bit of a mess to work with. I'm sure I got quite a few on my craft room floor - hopefully the cats don't think they're something yummy to eat!


I got a new camera! Can you tell? I sure can - seems like my photos are so much better. I haven't figured out how to use it other than on the "auto" setting, but why even bother when the auto does such a good job! And here's one last picture of me and my son, Chris, on Veterans Day. I went down to Blacksburg to visit him, and a really nice lady working in the Burger King offered to take out picture. I love my son's pose - so much swagger!

  
Thanks again for stopping by! Hugs and showers of blessings to you!

Saturday, November 9, 2013

GETTING READY FOR CHRISTMAS WITH RICK ST. DENNIS

Hi, and thanks so much for stopping by to visit. I am so excited! Our Saturday Paper a la Mode Challenge this week over at The Outlawz has a new sponsor - Rick St. Dennis! If you are not familiar with his digital stamp designs, you need to hop on over to our challenge and see what the Design Team has created, because we were lucky enough to be able to use his digis for our weekly projects. And if you like what you see, stop by his shop at Zibbet and see all of his designs - he has a bunch of them, and something for everybody's taste and style. For my projects, I chose the Holiday Cottage Scene digi - I just love nostalgic winter scenes like this one.

My first project is a framed piece to sit on my mantel.  I printed the digi onto sticky-back canvas, then colored it with Copics.  It was the first time I have tried Copics on canvas, and it's a bit tricky.  The colors come out much darker than I would normally expect, and there isn't much blending you can do.  You also have to be careful because the canvas can wick the color through its weave and you'll get bleeding outside the lines, so start out gently and see how each color works with the canvas.  I added some embellies, and even though you can't really see it in the photo, all the snow has Stickles added to give it some bling.


 The second project, which you can see leaned up against the frame in the other picture, is a couple of little ornaments/gift decorations that I made using shrink plastic. I first printed the digi onto the shrink plastic - since it shrinks to about 1/4 of its original size, I printed two copies of the digi onto one sheet of shrink plastic (it's letter size paper). Then I colored them with Copics, let them dry, and used my heat gun to shrink them. I also stamped some sentiment banners and shrunk those as well to add an extra element to the design. Then I made some little beaded decorations to add as well just for some bling.


I hope you like the projects I made using this fabulous Rick St. Dennis digi. Please stop by his store and check out his work - he is an amazingly talented artist, and we certainly appreciate his generosity as our weekly sponsor! Thanks again for stopping by! Big hugs and blessings to you!

Saturday, November 2, 2013

SNOWMEN

Hello, and thanks so much for stopping by! This week's challenge over at The Outlawz Saturday Paper a la Mode is to make a project with at least one snowman (snowwoman?). I had this cute little digi in my files, and unfortunately I can't recall the name of the artist - so sorry about that. But I just thought it was precious, so I tried it out and put this cute little card together.
Last week I was making a Christmas card and could not find any red cardstock - seriously, who doesn't have red cardstock on hand??? But I found some this week that has a little snowflake-like shape embossed into it, but you probably can't see that really well here just because of the way I cut it and the other paper that's on top. I seriously need to order some red cardstock. I used to have a LLS that I could get all my cardstock from, but she shut down a year or so ago, so now I have to order it. Not that I mind - it's just making myself take the time to do it, and also keeping my spending in check at the same time. They probably have some at Michael's though now that I think about it, so perhaps I'll check there in the next few days. Always up for a trip to Michael's! Thanks again for stopping by to visit! Hugs and showers of blessings to you!

Wednesday, October 30, 2013

LATE POST AGAIN! ANYTHING GOES THIS WEEK

Well, here it is Wednesday already, and I should have posted this on Saturday.  But like I always say, I don't call myself the Procrastinating Scrapper for nothing!

Without further adieu, our Saturday Paper a la Mode challenge this week at The Outlawz is "anything goes".  I was bumbling around for an idea for something to make, and I ran across this sweet digi I colored last year but never made anything with.  The digi is from A Day for Daisies - always my favorite!

The papers and embellies are things I already had in my stash - still sticking with my "use my stash" theme for awhile, although I did discover that I am in dire need of some red cardstock, so I will be placing an order before too long for some necessities like that.


Thank you for stopping by!  Hugs and blessings!

Saturday, October 19, 2013

IN THE CORNFIELD IS A SCARECROW

Greetings, and thanks for stopping by to visit!

Busy week for me, getting ready for a party at my house tomorrow (Saturday).  Going to be lots of fun, but so much to do.  In the meantime, I did get some crafting time in, and I made a cute little card with a scarecrow on it.

I got the scarecrow digi from an Etsy Shop, Baker Street Digital.  This scarecrow isn't your typical cutesy scarecrow.  It's not really creepy either - just a bit different.  I'm different, so why not have a scarecrow that's different?


I colored him a bit with some Copics, distressed around the edges with some Distress Inks, and added a bit of Stickles to his scarf.  The other additions - the swirls and banner and buttons and background papers are all old stuff I've had in my stash for ages.  I've been on a mission to use up what I already have, which will probably take forever, instead of buying new things.  It's been quite a few months since I've purchased any new crafting goodies (other than a few beading things), so I am doing good on my "use what you've got" resolution.

Thanks again for stopping by!  Big hugs to you, and showers of blessings!

Saturday, October 12, 2013

"T" IS FOR TURQUOISE

Hi, and thanks for stopping by!  It's Autumn, my favorite time of year, which always gets me in the mood for making Christmas cards and decorations.  So this week I made a pretty Christmas card in an unusual (or at least not traditionally associated with the Holidays) color, turquoise.

Our challenge this week over at The Outlawz is to make a project, with the predominant color starting with the first letter of our first name.  I actually had to give this one some thought - what color starts with the letter "T"?  I kept thinking teal, but was pretty sure I didn't have a lot of supplies in that color, but then the light finally came on - turquoise!

So I found these papers I had in my stash from MME and this fabulously beautiful trim that I had been saving the last piece of, and decided on this card.  I added a bit of Stickles (diamond color) for a touch of bling, and some buttons.  Easy to make and relatively simple for me, but I love the colors - I guess I'll have to do more Holiday projects using turquoise!


Thanks for stopping by to visit, and I hope you have a wonderfully blessed day!  Big hugs!

Monday, September 30, 2013

CAROUSELS

Well, I'm late this week as usual - I should have had this posted on Saturday, but now it's Monday and just getting to it.

This week I made a birthday card using a carousel horse digi that I got from Little Scrap of Heaven Designs - there are a lot of nice freebies on that site.  I was googling looking for a carousel design, and found this one for free - can't get any better than that!

I colored it using my Prismacolor pencils.  Sometimes I just have a hard time using my Copics for some reason - I find using Prismacolors is much less stressful, there's no need to rush to get the colors blended, and there's just a lot more freedom when using the pencils as opposed to markers.  I use odorless mineral spirits with one of those paper stumps for blending purposes.  Speaking of OMS, I am about out - I have had this same bottle for several years now, so I need to pick up some more.  I'll just refill the bottle I have though, because it has this nice top that allows you to get your paper stump damp with a little sponge type thingy (I should probably put a picture on here so you can see what I mean).


I tend to go with a "less is more" look when I color with pencils.  I picked that up somewhere along the line from someone else in the crafty world, but unfortunately I can't recall her name at the moment - I want to say her first name is Darcy.  I like the soft feel of coloring around the edges and leaving a lot of highlight space.

Thank you for stopping by to check out my carousel horse.  Hopefully you'll find time to leave me some love in the comments section.

Have a wonderfully blessed day!  Big hugs!

Saturday, September 14, 2013

A MOM AND HER SOLDIER

Okay, more scrapbooking this week.  I can't remember the last time I made two scrapbook pages in a row - probably not in years.  But this week's challenge theme over at The Outlawz Saturday Paper a la Mode is MONOCHROMATIC.  I actually chose that theme, because I tend to go monochromatic a lot anyway.

I had this photo of me and my son at his recent Basic Training graduation at Fort Benning, Georgia - this was 2 days before he had to be back to college for the fall semester.  He's enlisted in the National Guard while he's going through Army ROTC at college.  Anyway, I love this picture of Chris, so decided to use it for my challenge project.

It didn't turn out strictly monochromatic, since I used a bit of blue border for the photo to match the blue on his beret, and the background paper has a hint of blue in it, but I like it a lot.  I have quite a few scrapbook frames that I've purchased from Target over the years, and I put some of my scrapbook pages in them for display.  Since I've been doing some new pages lately, I've decided it's time to replace some of the older layouts with some of the newer ones - this is definitely one I will put on display.


I chose the title "Like Mother Like Son" because I was also an Army officer.  So proud of my boy!

Thank you for stopping by!  Big hugs and showers of blessings to you!

Monday, September 9, 2013

BACK TO SCHOOL

Oh yes, it's that time of year again.  Of course, my kiddos are all grown up now - Michelle's been graduated from medical school over 2 years now, and Chris is a sophomore at Virginia Tech.  No little ones running around for chalkboards and pencils and rulers and such.  But I did happen to get a couple of pics of Chris moving back into his dorm on August 24th, so I decided to use one of those for my project for this week's Saturday Paper a la Mode Challenge over at The Outlawz.

Virginia Tech's colors are maroon and orange, so I went with that idea as I was building this scrapbook page.  It's been a while since I've done any scrapbook pages (I think this time last year was the last one I made), but I really need to get back into it and do something with the gazillion photos I have!


Love that young man!  Gotta make some time to get down to Blacksburg (a 4 hour drive) to see him, because I don't want to wait until his Thanksgiving break.

Thanks for stopping by to visit!  Big hugs and showers of blessings to you!

Saturday, August 31, 2013

JUMP START

So glad you stopped by to visit!  This week I decided to get a jump start on some Halloween cards.  I had some sweet digis from A Day for Daisies all printed out in my box of pre-printed digis, and decided to use this cute little mummy guy - isn't he the cutest thing ever? - to make a card from one of my adorable little nephews.


I colored the image with my Prismacolor pencils for some subtle shading, then added some background shading with my Copics.  Found some sentiment stickers in my stash that were really cute (they are glittery, but you can't really see it in the photo) and added some buttons from my collection to finish it off.  I have 5 grand-nephews, and I like to send them a little something every once in awhile, so one of them is going to get this card.  Now I've just got to get busy and make 4 more, plus 3 for my little grand-nieces!

Thank you for stopping by, and have a wonderful blessed day!  Big hugs to you!

Saturday, August 3, 2013

Inspired by Pinterest

Hi, and welcome!  This week I was spending some time looking around over at Pinterest, and I ran across a fabulous card by Nicole Heady, who is one of the Papertrey Ink design team ladies.  It was white stamped on kraft cardstock, then the white was outlined with a Copic marker.  Love, love, love!  If you want to see Nicole's card, here is the link:  Link to Nicole's card (you need to scroll down a bit to see it).

So I decided that would be my inspiration for our "Inspired by Pinterest" challenge at the Outlawz for this week's Saturday Paper a la Mode Challenge.  I love this challenge!  My daughter and I cook Pinterest recipes all the time, so I probably should have put a picture of something yummy here, but since it's a paper challenge, that wouldn't quite hit the mark.  In fact, I am making two different recipes tomorrow to take to a picnic that I got from Pinterest (maybe I'll take pictures and post them next weekend).

Anyway, I pulled out my trusty white inkpad (which is getting a bit dry because I rarely use it), a pretty flower stamp from Unity Stamp Company (I got it when it used to be the Ippity Stamps), and some of my large stash of kraft cardstock (I like to keep lots on hand, because kraft and black cardstock are my go to colors).  I also added some of my favorite mini alphabets for the sentiment, a pretty ribbon, and a few tiny jewels for flower centers on the 3 flowers I cut out and raised up with pop dots.


I like the way it turned out, and I plan to try this technique a lot more - maybe with some different colors to see what that looks like (will probably try a scrap first).  One note:  the Copic ink sinks into and spreads fast on the kraft cardstock because it's so porous, so just be aware.  It also didn't take a very dark color to do this, probably because the color sinks in and spreads so quickly - it would be different if it were on the typical smooth cardstock we use for Copic coloring.  I love the depth that the outlining adds!

Thank you for stopping by!  Big hugs and showers of blessings to you!

Thursday, August 1, 2013

Hop, Skip, Jump

Obviously I'm late and need to "hop" to it and get this project posted from last weekend!  As I always say, they don't call me a procrastinator for nothing!

I made this card using a digi I've had for several years from Daphne Hardy.  Daphne was making digis for a short while, and her stuff was just so cute and special, but alas, she left the scene and decided to do something different.  But nevertheless, I just adore this sweet bunny - I colored it with my Prisma pencils and then added some background shading and color with my Copics.  I'm still using older papers and things from my stash - not buying any new stuff until I pare down some of these pile of stuff I already have on hand!


Thanks so much for stopping by, and have a "hoppy" day!  Big hugs and blessings to you!

Friday, July 19, 2013

CHRISTMAS IN JULY

Yes, it's only 6 months away!  I love making Christmas cards and decorations and goodies (especially the yummy goodies), so Christmas in July is always a fun crafty theme time for me.  That's our theme this week over at The Outlawz for the Saturday Paper a la Mode challenge.  I love to make cards, but a lot of times I want to do something more 3-dimensional.  I decided to make some decorations.  I've made something similar to these before and used them for pumpkins and hearts - very versatile if you have the right shape of punch or die, or if you have a Cricut or other electronic cutter that can cut lots of the same shape.

I decided to make 2 different ones just so you can see the difference if you use more or fewer cutout pieces.  The one with the beads only uses 8 pieces, and the other one uses 16 for a much "fuller" shape.  After I put them together, the one with the 8 pieces looked so sparse that I started looking for a way to fill in some of the empty space.  I have a lot of beads in my stash so started "engineering" (I put that in quotes, because I'm not an engineer and my solutions are typically not so "elegant" as a real engineer might make) a solution for getting the beads onto the ornament.  What I ended up using is 8 strips of very thin wire (one for each "slot") to thread the beads onto - the wire is bent in half, with the "bend" at the bottom, one leg running up through the center of the ornament and one leg running up through the beads, then twisted together at the top, where the twisted end is wound into a little spiral shape (looks a bit like something from a Dr. Seuss show).  Hopefully that explanation makes sense.  I used a variety of beads and configurations for some variety, but obviously you could use whatever colors and shapes and arrangements that make you happy.


This second picture shows the beads a little more close up so you can see the details.


Hopefully you find time over the next 6 months to get all the cards, decorations, and goodies created that you want to - I tend to always run out of time, but maybe now that this challenge has given me a bit of inspiration, I will continue with my "preparations".

Thanks for stopping by!  Big hugs and showers of blessings!


Saturday, July 13, 2013

GIFT WRAPPING

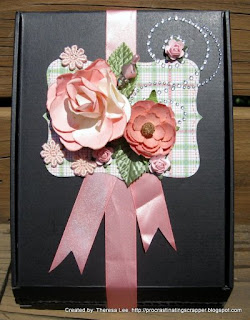
When 3 of my daughter's friends were graduating from their resident program, she and the other residents pitched in and bought each of them a Kindle.  Michelle was responsible for the gift buying and wrapping, so when it was time to wrap the Kindles up, she came to me for assistance.  I started showing her some options, because she didn't really want to use wrapping paper, and things just snowballed from there, with me in the middle of the snowball rolling down the hill!  Ha!  Ha!

I used a variety of different ribbons and goodies I had in my craft room, including a die cut shape as the "background" for each decoration.  The die I used, which is my all time favorite, is the Top Notes die from Stampin' Up - love that thing!

The one with the big star is for a guy, and the other two are for the ladies.


I enjoyed doing this, and Michelle said they loved how pretty they were decorated.  I fixed the wrapping so that the ribbon would come loose without having to remove any of it, then reattach back in case they wanted to keep it for something else.

Thanks for stopping by!  Remember to stop by The Outlawz and play along with our Saturday Paper a la Mode challenge.  Our theme this week is: USE YOUR FAVORITE TOOL, AND TELL US ABOUT IT.  My favorite tool is my die cutting machine (I have a Sizzix) and my Top Notes die.

Big hugs and showers of blessings!

Saturday, July 6, 2013

SUMMER!

Looks like summer has finally made it to my part of the world.  Seems like we had a couple of weeks of just clouds and rain, clouds and rain, but the 4th showed up beautifully, and now we've had a few days of hot sunny weather, and it looks like we'll have a few more.  This morning is gorgeous outside!

This week's theme over at The Outlawz Saturday Paper a la Mode Challenge is SUMMER!  I had some leftover summer-themed papers from Webster's Pages that I used to make a banner a couple of years ago, which I gifted to my dear friend Jenn - she hangs it on the wall of her craft room, which makes me feel very loved!  This is a picture of the banner - I loved making all the different layers and adding in the little elements.


Hard to tell from that photo, so here is a closeup of one of the parts:


I also had a leftover little mason jar filled with flowers from when I was trying to make some ATCs (I find it very difficult to work in such small size), so I used that as the center of my card, and built the rest of my summery, patriotic card around that.


Thank you for stopping by, and I hope you are enjoying your weekend!  Big hugs and many blessings to you!

Saturday, June 8, 2013

VINTAGE STYLE

Oh goodness - how time flies!  Here it is another weekend already!  Not that I'm really complaining, but it just seemed like I can never get the things accomplished I mean to, if you know what I mean.

This week's Saturday Paper a la Mode Challenge over at The Outlawz is to make a "vintage" style project.  I'm not sure how good I ever am at sticking to a script, so to speak, but this is my "take" on vintage style.  I actually love this sort of "flowery" look, with lots of layers and flowers and things, but I do try to get away from it sometimes and try to do the "less is more" look, although I'm certain that I'm not so good at that look.  My philosophy is usually if there's an inch of blank space, I need to glue something to it!

Anyway, here's my card:


Thanks for stopping by to visit!  Big hugs!

Saturday, June 1, 2013

TAGGING a GIFT

Hi, and thank you so much for stopping by to visit!  It's Saturday again - woo hoo!

Our challenge for this week over at The Outlawz is to make a project involving tags and/or labels.  My sister-in-law, Annette, has been under the weather of late, so I wanted to make a little gift for her.  She loves my home-baked goodies, so I decided to bake her a pan of my homemade cinnamon rolls.  But then I decided I needed something to personalize the food, so I decided to make her a tag with an envelope attached to add a gift card.

I used a bunch of scrap papers I had laying around from a project ages ago, but that I still love with the pretty blues and blacks combination.  I think it turned out really nice, and she will love it.  It's very feminine and has little pearls and pretty curves.  I wrote a nice message to her on the back.


Now I've got to get busy and bake those cinnamon rolls so I can take them to her today.  I know she's going to love them and the tag, and we will have a great visit together!

Thanks again for stopping in to visit!  Love and hugs to you!

Friday, May 24, 2013

SUMMER!

Hi, and thanks for stopping by to visit!  Well, it's Memorial Day weekend and the "unofficial" start of summer.  I decided to make a card for 4th of July this week - I got this digi last summer, but just now got around to making something with it.  When I was trying to take the picture the wind was blowing like crazy and it was making the tree next to my deck throw shadows all over the place, so it's not the best picture in the world.  I love that red polka dot paper though!


I hope your weekend is wonderful with lots of lovely weather, and perhaps a beach and a barbecue!  I don't have any big plans, but will probably do a cookout with my kids.  Whatever you decide to do and wherever you are (I know my international friends don't celebrate our Memorial Day), be safe and blessed!

Hugs!

Saturday, May 18, 2013

LABELS

Hi, and thank you for stopping by to visit!

I am still in my reorganizing mode, although it's a little bit here and a little bit there process as time (and my motivation) allows.  This week I want to share some labels that I made for the bins on this cool storage unit I recently got from Ikea.  I really like this contraption - it was easy to assemble and hang, and it's just so useful and the bins are easy to pull out and put back in!

I used a couple of dies and cut out different papers, then glued everything together and added some letter stickers, flowers, and pearls.  I have some other larger bins that you can't see in this photo that I've also put labels on (just now as "embellished" as these).  I hope to have everything completed soon so I can share some pictures of the entire room.  This shelf is hanging on the wall over in one corner.


This closeup is for my "stuff" that I either can not find another place for, or else I'm just too lazy to find where it's really supposed to go.  Everybody needs at least one of those junk gathering spots!


Thanks again for stopping by!  I appreciate you taking the time to visit, and I hope your day is blessed!

Saturday, May 11, 2013

BOATS

Hi, and thanks for stopping by!  It's getting that time of year (finally) around here - summery and boats!  I live on the coast of Virginia, so there are boats upon boats upon boats around this area.  Unfortunately for me, I tend to get seasick due to inner ear problems, so I don't spend a lot of time on boats anymore, but they are still cool to look at.

This week at The Outlawz our Saturday Paper a la Mode Challenge is to make a project with a boat.  Well, as much as I'm surrounded by boats, I did not have a single thing in my stash that even remotely looked like a boat - I don't do a lot of masculine projects - just not my thing.  So, I downloaded a clipart from Microsoft into Power Point and printed it out to use as my digi.  I colored it with Copics - and speaking of Copics, my beautiful and generous daughter ordered me another Copics storage rack like the one I already have because I ran out of storage space - yah!


I added that cute velvet rickrack to look like waves in the water - I love the colors I used - so summery!  I hope you can stop by The Outlawz this week to play along with us.

Thanks again for stopping by, and have a blessed day!  Hugs!

Saturday, April 27, 2013

Organization

Hello, and thank you for stopping by!

I have been busy the last couple of months trying to get all the spaces in my home more organized, get rid of the clutter, and have everything in its place.  One of the issues I have now that there are 3 adults getting mail at my house is where to put it all.  I have also been in the process of cleaning and organizing my craft room (still some work to do there), so I had this set of extra baskets that I love because they are beautiful, but they just didn't work in my craft room anymore.  So I decided they would be perfect for sorting the mail.

But I needed some way of identifying which basket is for who, so I decided to create a set of custom tags - one for each of us.  I used my banner dies and a lot of scraps and odds and ends I had laying around to make these, and I love how they turned out.  Even Baby approves!


This first one is for my daughter Michelle.  It was originally going to be mine, but then I realized the colors were just like her, so I put the "M" on it for her.  She loves it!


This one is for me.  It was originally going to be Michelle's, so I had already put the "m" on it, but then I just added the smaller alphabets for "mom" and made it mine.  It's my favorite anyway!  I love the pink and cream colors - so pretty!


This one is for Chris.  He's away at college, but there is always mail coming here for him, so I needed a place to keep it if I think it's something he will want to see.  This was my attempt at a masculine tag.


And one more of my sweet Baby.  Since this "miscellaneous" basket doesn't have a tag yet, she's decided this one is for her.


Eventually I am going to hang a shelf on the wall for these baskets above that Eiffel Tower picture in the background, but for now they are fine on this entryway table.

Thanks again for stopping by - love, hugs, and blessings to you!

Saturday, April 13, 2013

Hey!

Hey everybody!  Busy, busy, busy as a bee lately!  I am heading down to Blacksburg, VA this weekend to see my son Christopher who is finishing up his freshman year in the Virginia Tech Corps of Cadets.  I am of course so proud of that handsome rascal!  Will have pictures to share upon my return.

In the meantime I did manage to squeeze in a few minutes of craftiness this week, but nothing on the scale of my bunny project from last week.  This week it's just a simple "hey" card.


Thanks for stopping by, and we are still in the middle of our series of "anything goes" over at The Outlawz Saturday Paper a la Mode challenge, so come on by and play along with us!

Hugs and blessings!

Saturday, April 6, 2013

Bunnies and Bunnies

Hi!  As many of you may already know, my favorite animal for collecting and crafting is BUNNIES.  Yes, I am a hippity hoppity girl!  I have this shadow box that I have had for a couple of years and just recently decided to try decorating it for Valentine's Day, which you may have seen a couple of months ago.

Well, this time I decided to decorate it for Easter with bunnies, although I didn't get it finished until a week late (they don't call me a procrastinator for nothing).  But since I love bunnies, I'm going to hang it up in my craft room and leave it there until I decide to redecorate it for another holiday or special occasion.

If you try something similar, you can take the "insides" out of the shadow box (each little cubicle is 4" x 6") and put them on a card base and use them for greeting cards, or you can just keep them until the holiday/occasion rolls around again next year.

So this is what I made.  This is also my project for this week's Paper a la Mode Challenge over at The Outlawz.  Come on by and take a peek at what everyone is making and play along with us if you can!


Thank you for stopping by!  Have a blessed day!